VPS Rescue Mode
Last reviewed: June 2, 2026
What is Rescue Mode?
Rescue Mode boots a minimal operating system independent of the server's main disk.
It's designed to help you troubleshoot and fix issues such as boot failures, misconfigurations, or corrupted filesystems.
Once your issue is resolved, you can disable rescue mode and the server will return to its standard operating environment.
This is an amazing tool if you run into the Blue Screen of Death, were hacked, or your VPS is facing other issues rendering it inaccessible or inoperable.
This feature requires you to know the basics of Linux, or you may use an SFTP program like FileZilla or WinSCP.
Please note that these are third-party applications and therefor fall outside of our scope of support, you will need to operate these independently.
How to use Rescue Mode
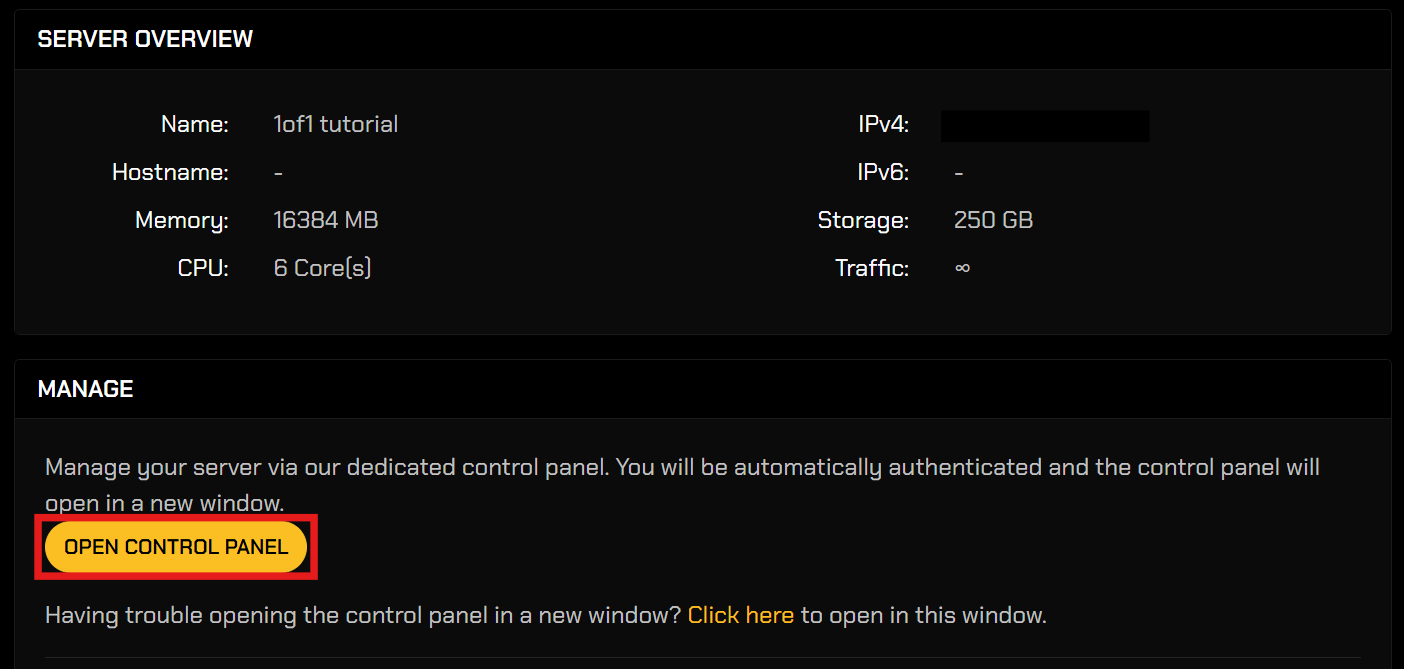
Go to the VPS Dashboard
in the Home Page of your client portal, click View Details on your VPS.
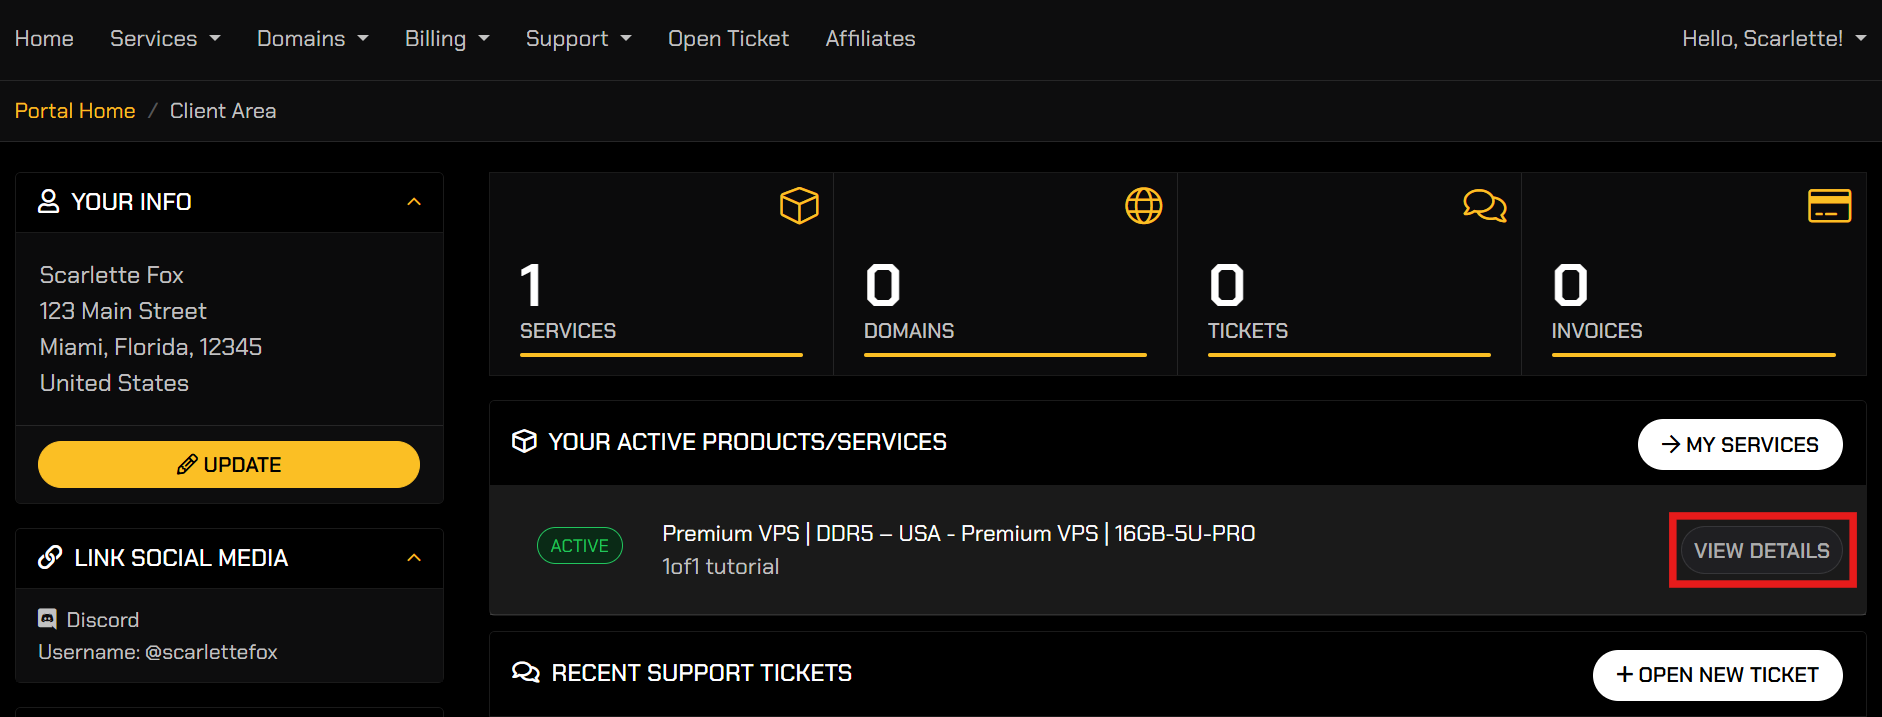
Select Open Control Panel.
Go to the Options Tab
Click on the Options tab in the VPS Dashboard on the navigation bar.
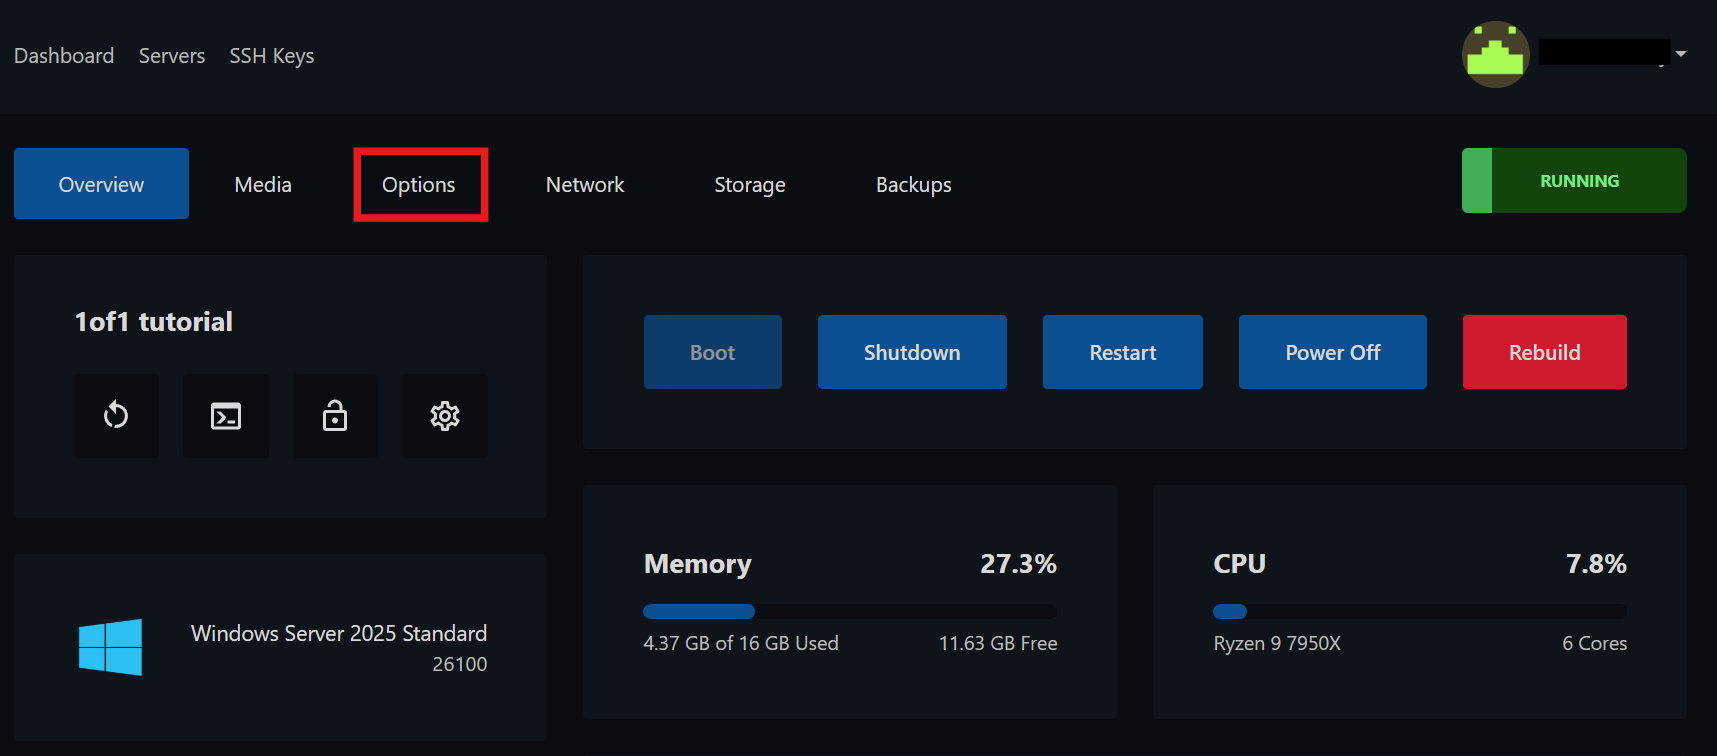
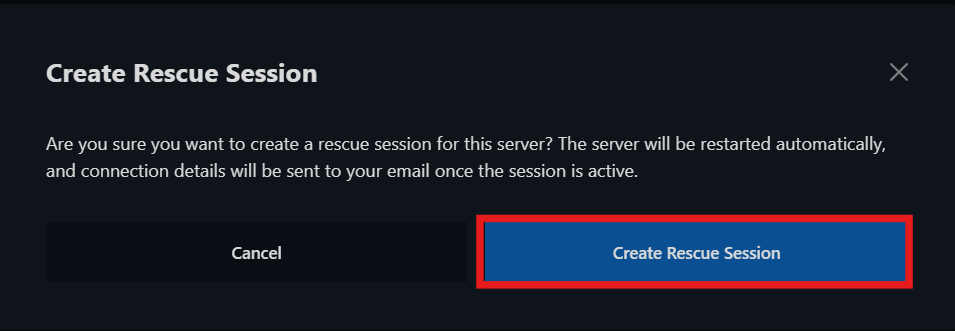
Initiate a Rescue Mode Session
In the Options tab, click the Create Rescue Session button, there is no need to select a rescue system as only Linux (Debian Live) Rescue V1 is available.
Creating a Rescue Session will essentially boot the server with a Debian operating system that is directly attached to the disc of your server so that you can access the core systems of the server even as it is inaccessible or inoperable.

Accessing the Rescue Session login credentials
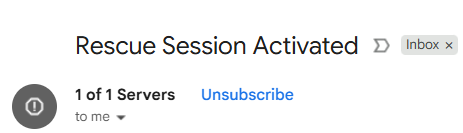
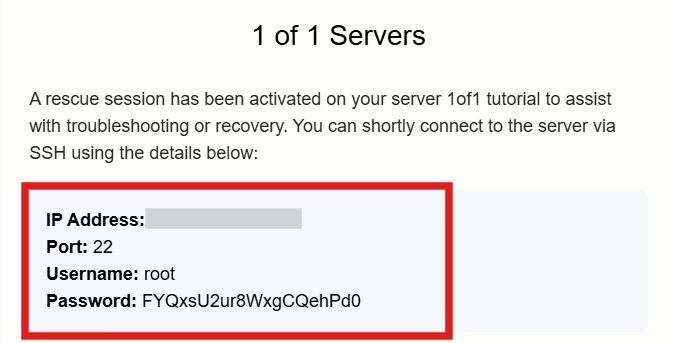
Once the session is activated, you will receive an email containing your SSH login credentials to log into the session.
- These are temporary credentials only valid for this Rescue Session and its duration, once the session is disabled/closed these credentials (username/password) will become invalid and you will return to using your original credentials to connect via RDP as you've done previously.
Go to your email inbox and search for an email titled Rescue Session Activated. Your credentials will be provided within this email.
Logging in
You may login via SSH command with the credentials, if you have an SSH program. Or you may use the console within the VNC of your VPS on the Dashboard.
This documentation will demonstrate logging in using the VNC console on the VPS Dashboard, to enable and access VNC please view the VNC guide and return here when it has been enabled.
- Open the VNC window, you will see that is now a command prompt environment. For the following lines, enter:
Rescue login: root
Password:enter the password provided in the email, the characters will be invisible as you type and the underscore will not move, this is normal! Simply hit Enter once you have finished typing the password.
If successful, the section Rescue System ENV v1.1 will populate.
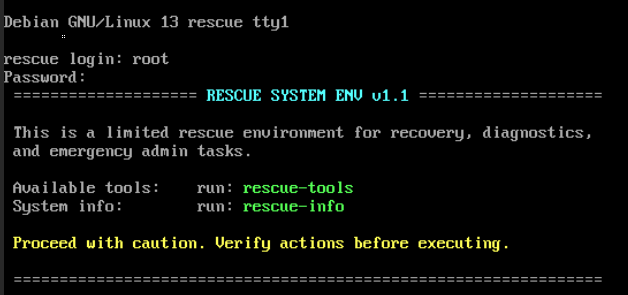
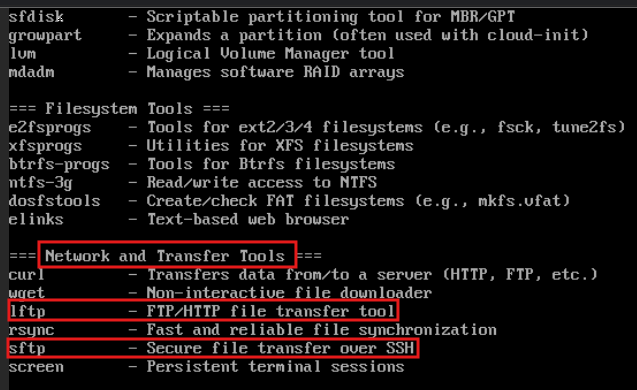
Available tools & System info Options
The Available tools rescue-tools option will open a catalogue of tools at your disposal to troubleshoot, diagnose, and treat your server to repair it.
- You can also simply pull all your files from the disc to your own PC using the lftp or sftp command (see below), then rebuild the VPS to start anew and import your files back to the VPS using the SFTP program.
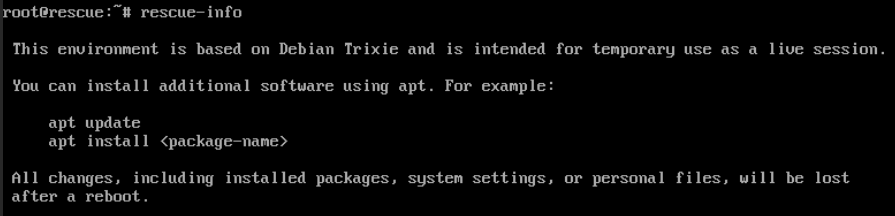
The System info tool rescue-info will enable the user to install any software temporarily on the server using apt. commands.
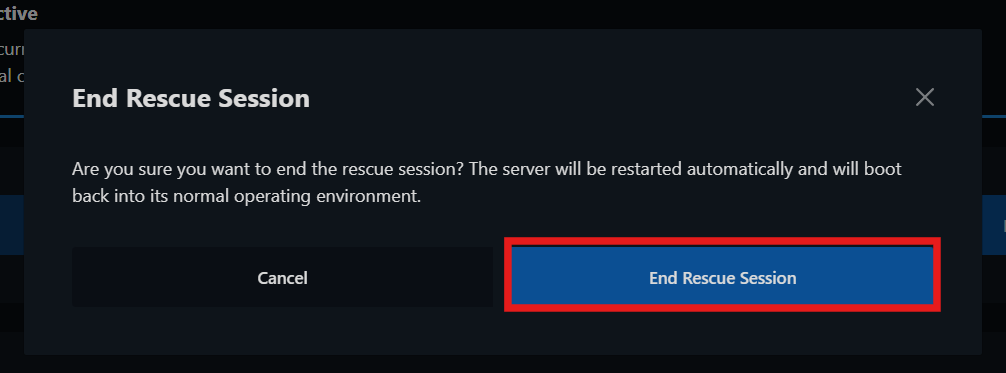
Ending a Rescue Session
Once you have completed all that you need to do, and your system is recovered or on the way to a speedy recovery, and you are finished with the rescue session:
- Go back to the VPS Dashboard,
- Click End Rescue Session on the banner, or the button within the Options tab,
- Then confirm the task by clicking End Rescue Session again in the pop-up modal.
Note that anything that you have installed or added when within the Rescue Session (such as installed software) will be deleted once the session has ended, only modifications to the system/server itself will remain the same (such as OS updates, firewall rules, etc).