Deploy your Operating System
Last reviewed: June 2, 2026
Step 3
Now that you have linked your Discord, it's time to build your VPS and complete the setup.
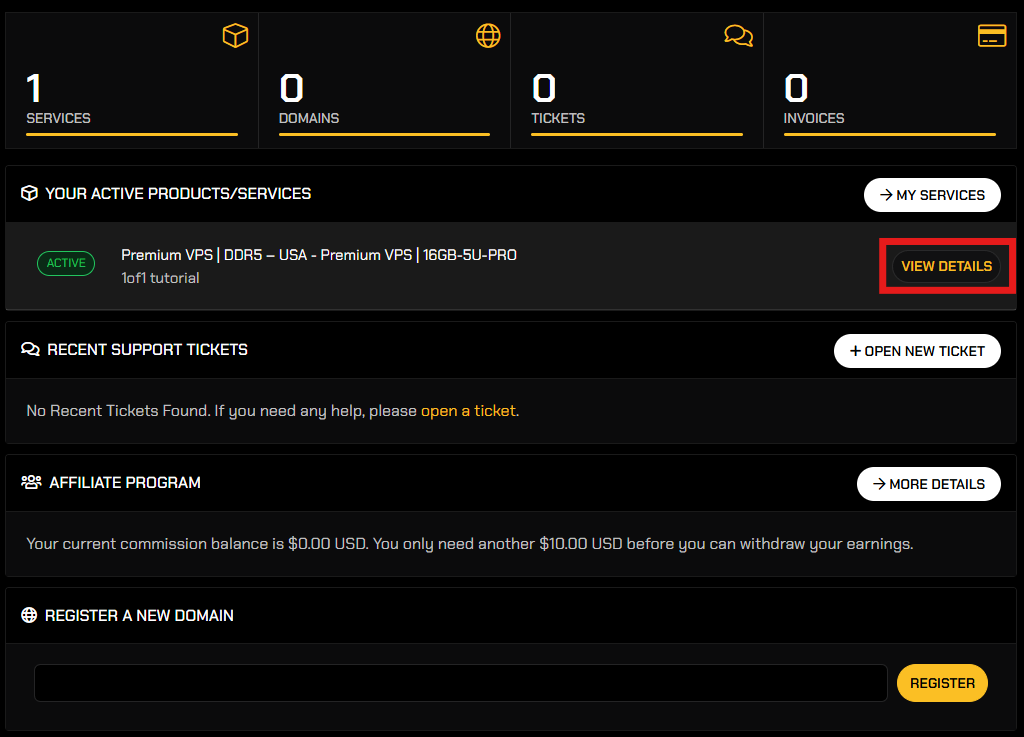
Log into your client area and click on your Gaming VPS.
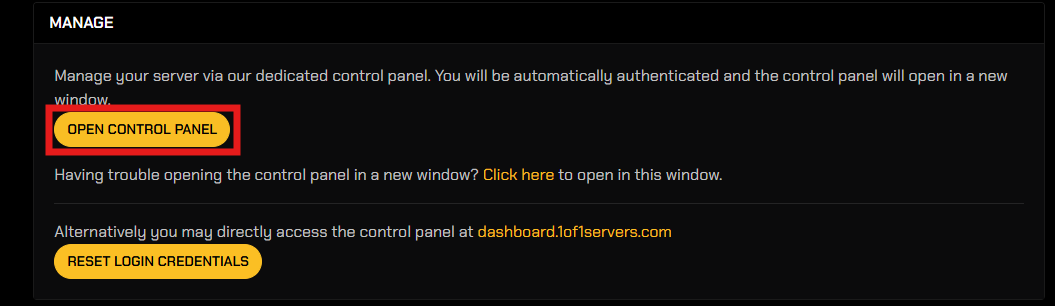
Click on Manage, this will take you to a portal where you initially navigate to your VPS Dashboard by clicking Open Control Panel.
Step 4
Welcome to the building stage of your VPS where you compile the core building blocks of your server:
Server Name
- Give your server a name to easily identify it in your account, we recommend your typical username or the name of the project you're currently working on. Don't worry, it can be changed later!

Hostname (OPTIONAL)
- Enter a Hostname, this is optional, we recommend you skip it! For easier identification of your VPS on a network, not just on your account (it can be the same as your server name).
- Select your Timezone, this is the time that is displayed on your server.
Not to worry, these can also be changed later!

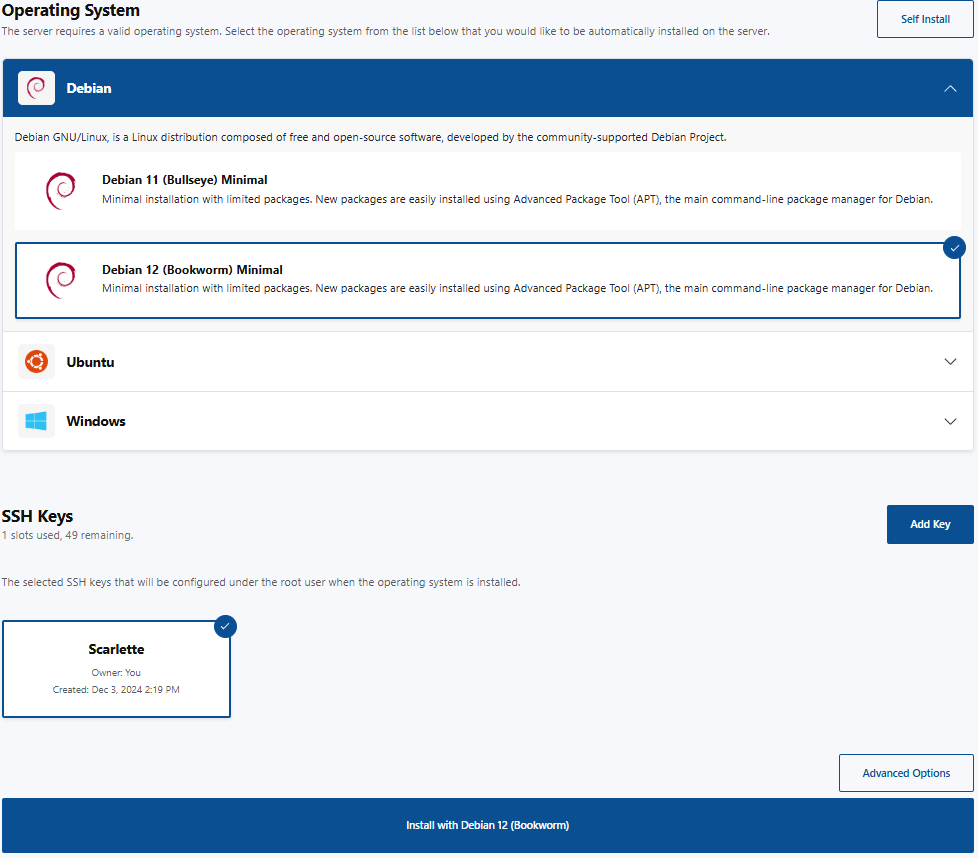
Operating System
- Select your desired operating system to be installed with your VPS from the following options:
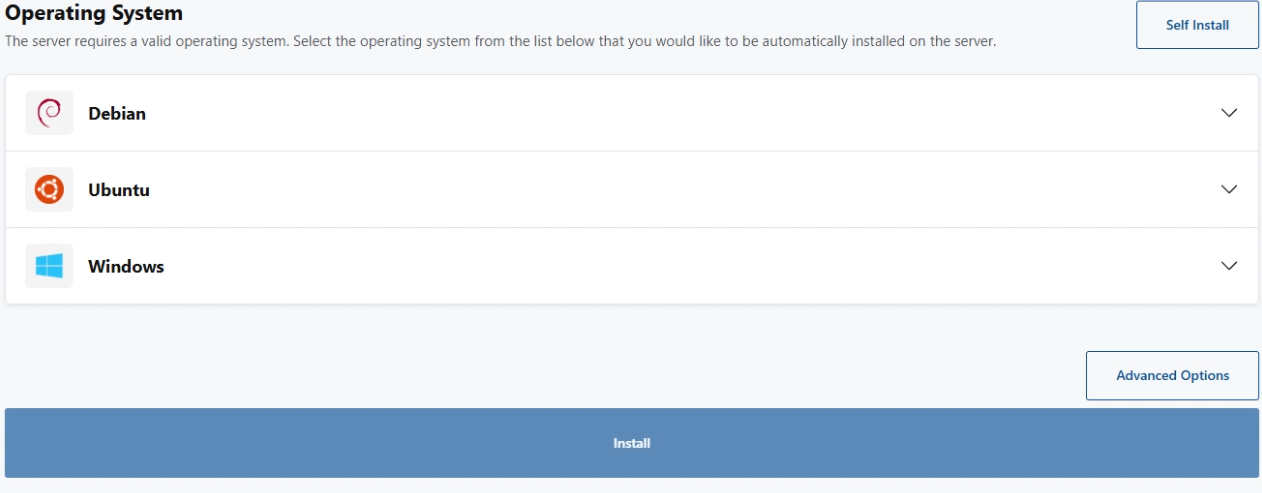
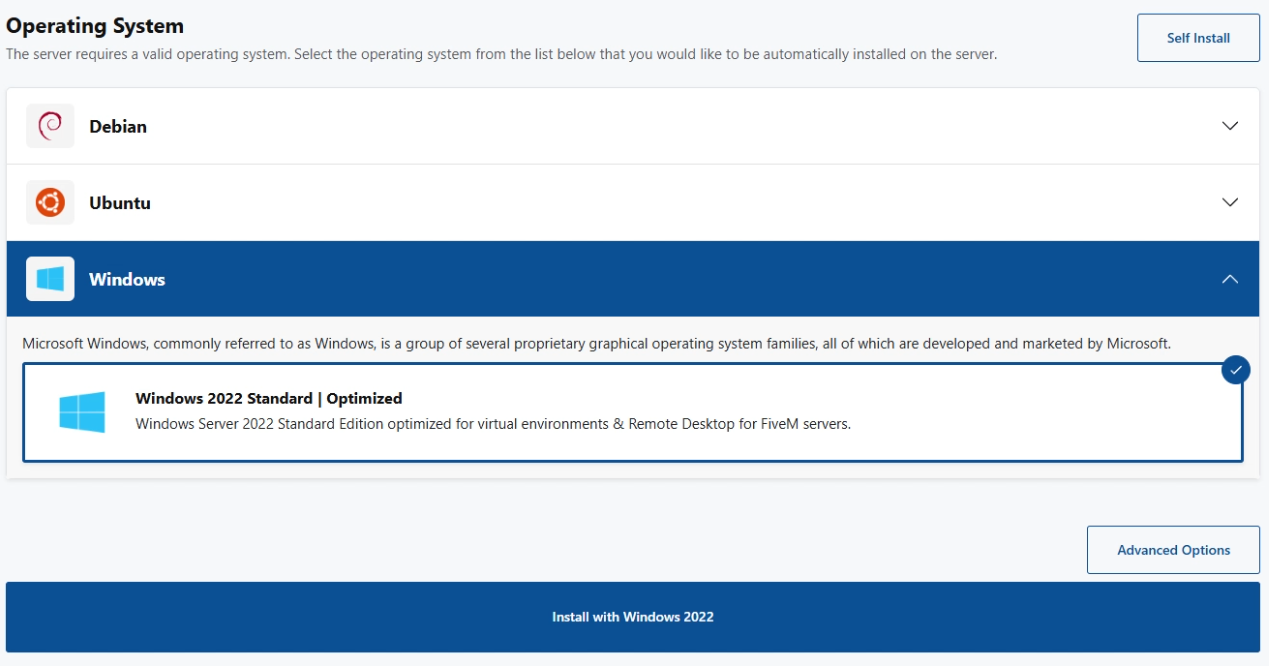
Windows - We strongly suggest choosing this option, it provides a user-friendly and seamless connection process to your VPS through Windows' Remote Desktop. It also delivers the most optimal experience when locally hosting your FiveM city.
Debian
This option is recommended for experienced users who are familiar with Linux, and those endeavoring to host websites. It is tried and true and a more stable and flexible Linux option, it is lightweight making it run better than Ubuntu on older hardware, however, the software is older and less user-friendly compared to Ubuntu. *Do not add a Secure Shell (SSH) key if you are unsure of how to use it. See Creating SSH Key for VPS Install for how to create SSH key.*
Ubuntu
This option is recommended for experienced users who are familiar with Linux and sudo commands, and those endeavoring to host websites. If you're not confident in using Linux, we advise against selecting this option. *Do not add a Secure Shell (SSH) key if you are unsure of how to use it. See Creating SSH Key for VPS Install for how to create SSH key.*
Self-Install
This option enables you to install your own International Organization of Standardization (ISO) file via Virtual Network Computing (VNC). This is not recommended if you are not confident in this topic!
Advance Options - If you are not an experienced user, please do not modify any settings within this section.
Experienced Users: if you need any other ISO, we have templates available. Please contact us via Discord or open a ticket to request your desired ISO and we will be happy to add it as a template for you!
Example of selecting Windows OS before installation:
Example of selecting Debian (identical for Ubuntu) OS before instillation:
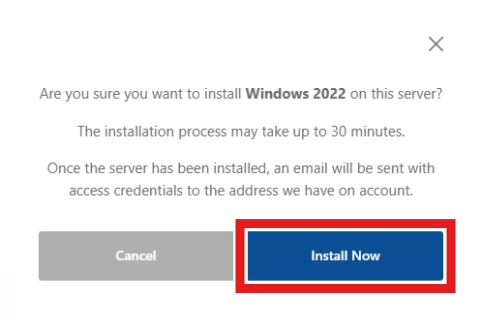
- After clicking "Install with [Debian, Ubuntu, Windows]", a pop will appear to confirm your install option, click "Install Now". Example shows installation with Windows 2022.
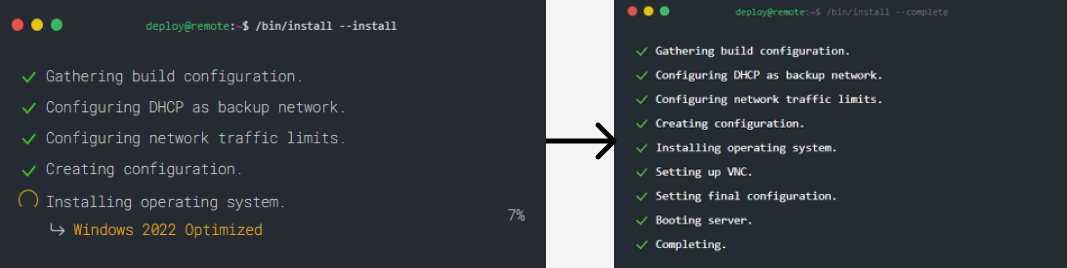
- You will then be taken to a new page that displays the building progress of your VPN. Do not touch! Allow the process to finish. (Example shows installation with Windows 2022)
You will receive an email within 3-5 minutes titled "Your VPS Server is Ready at 1of1 Servers!" that contains your initial login details for your VPS