Schedules
Last reviewed: October 3, 2026
The Schedules page allows for commands, power options, and backups to be automated, so you are able to enjoy your server in a more hands-free environment!
The page displays each schedule's:
- Name;
- Cron (its timing);
- Status (whether it is active);
- Whether it only runs when the server is online, and;
- Last run and next run.
Creating a Schedule
Let's create a schedule that restarts your server automatically.
Regular restarts can help reduce lag by clearing dropped items, saving the current world and its contents, and running the checks of a fresh boot cycle to repair any underlying issues.
To create a schedule:
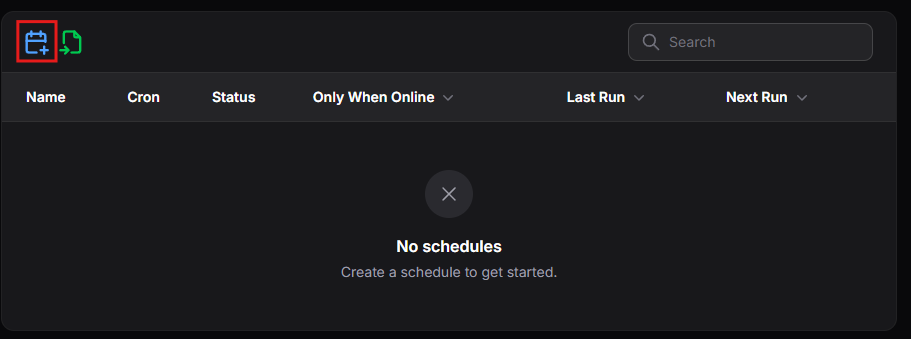
- Click the Create Schedule icon (the blue calendar) at the top left of the page.
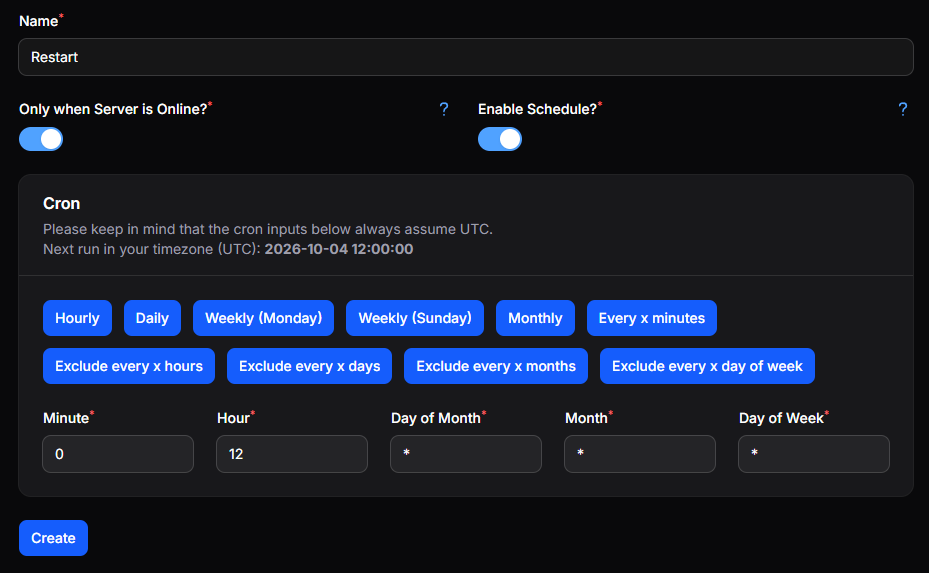
- Name your schedule (example, Restart).
- Choose whether the schedule should run Only when Server is Online.
- Make sure Enable Schedule is turned on.
- This makes sure the schedule actually runs. You can disable schedules at any time by editing them.
- Set the timing in the Cron section. You can click a preset like Hourly or Daily, or fill in the fields yourself:
- Minute, Hour, Day of Month, Month, and Day of Week
- Example: Minute
0, Hour12, and*for the rest runs once a day at 12:00.
- Click "Create".
The cron fields always use UTC time. The form shows when the schedule will next run, so you can double-check the timing before saving.
Want your schedule to run more than once a day? Use */ to repeat. For example, setting Hour to */12 runs the schedule every 12 hours (00:00 and 12:00 UTC), and setting Minute to */30 runs it every 30 minutes.
Adding a Task
Your newly created schedule will appear in the list, but it won't do anything until you add the Task(s) it should run. In our example, the task is restarting the server.
To add a task:
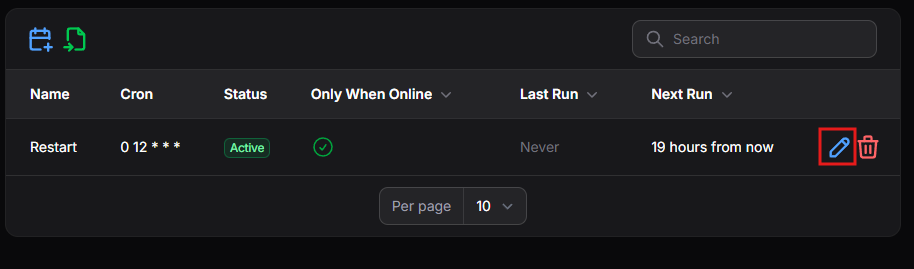
- Go back to the Schedules page and click the pencil icon beside your schedule.
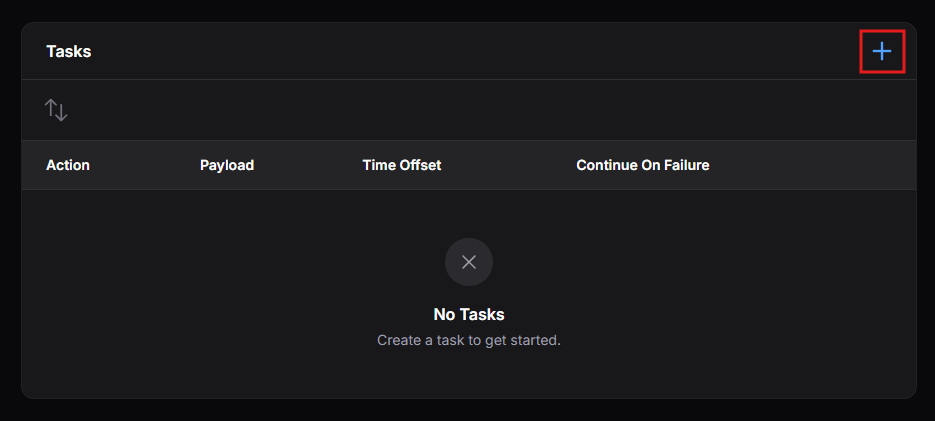
- In the Tasks section, click the + icon.
- In the Create Task window, select:
- Action
- The type of task, such as Send Command, Send Power Action, or Create Backup. Our example uses Send Power Action.
- Power action (or the command/payload, depending on the action)
- The specific action that is to be executed, example: Restart.
- Continue On Failure
- Whether the following tasks should still run if this task fails.
- Action
- Click "Create".
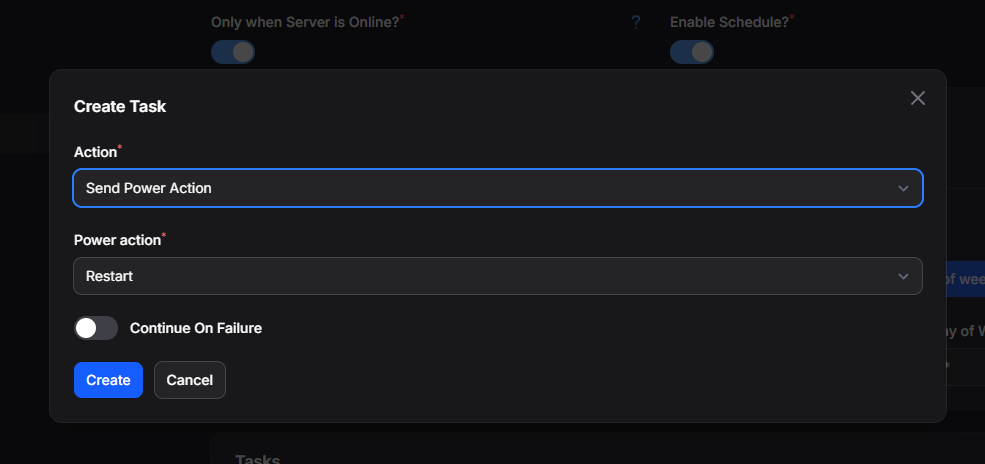
When a schedule has more than one task, each task after the first has a Time Offset: how long (in seconds) to wait after the previous task before running. This is handy for sending a warning message before a restart. You can drag tasks into a different order using the arrows icon.
Save your work!
- Click the Save icon (the floppy disk) at the top right of the Edit Schedule page.
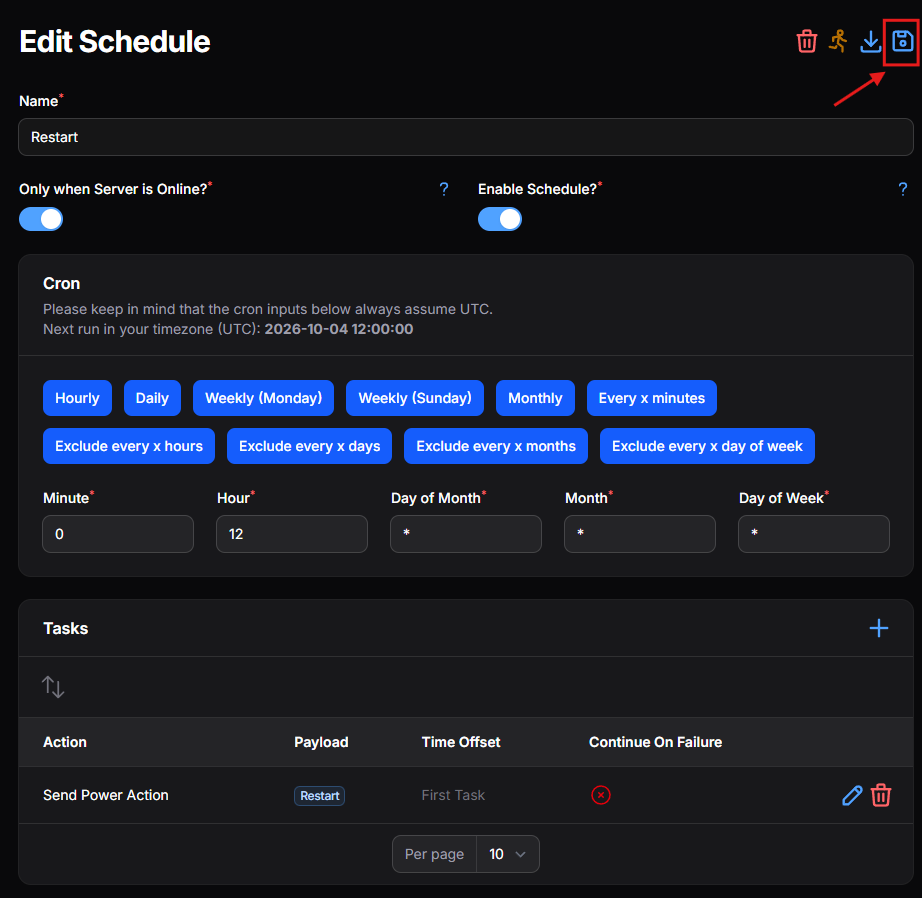
The other icons at the top of the Edit Schedule page let you delete the schedule, run it right now, or export it.
Example: Scheduled Announcements
This example will use a Minecraft Server. However, the features, functions, and instructions remain the same for other games.
The "Send Command" action is a great tool for executing commands on a regular basis, like /weather clear or /time set day in Minecraft. Or even for scheduling announcements!
This example will show how to post an announcement in the global chat every 30 minutes.
- Create a schedule named "Announcement" with the Minute field set to
*/30and*for the rest. - Click the pencil icon beside the schedule, then click the + icon in the Tasks section and select:
- Action: Send Command
- Command:
/say The best server in the world! Powered by 1of1 Servers.
- Click "Create", then click the Save icon.
Example: Automatic Backups
- Create a schedule with the timing you would like, for example once a day.
- Click the pencil icon beside the schedule, then add a task with Create Backup as the action.
- Click the Save icon.
Automatic backups count towards your backup limit. Make sure you have room for new backups, or the task may fail.